What is ThreadLocal?
In Java, ThreadLocal is a class that facilitates the usage of thread-local variables. This means it allows the user to store data specific to a particular thread independently. Each thread that accesses a ThreadLocal variable accesses its unique copy of the variable, thus ensuring that changes made by any thread are specific to variables of that thread and do not affect the value of the same variable in another thread.
This concept is instrumental when working with multithreading use cases like parallel testing in Selenium. This makes our system thread-safe, protecting each thread from unintended modifications.
Thread-safe is a term used to describe a piece of code, data structure, or system that can be safely used and modified by multiple threads concurrently without causing synchronization issues.
Using ThreadLocal in Java helps isolate the data and other information specific to individual tests at the test case level, ensuring each test has its local copy. This means we have a separate thread for each WebDriver instance. It prevents cross-thread interference, thus enabling us to execute test cases in parallel without worrying about maintaining test data and flow.
Advantages of Using ThreadLocal
Using ThreadLocal in Selenium Java for parallel execution provides several advantages. A few of them that make it the preferred choice for managing concurrent tests without any hiccups are:
- Thread Isolation
- Per-Thread Storage
- Thread Safety
- Concurrent Performance

ThreadLocal Class Methods
ThreadLocal instances are typically private static fields in classes and hold an implicit reference to its copy of a thread-local variable as long as the thread is accessible. These values can be accessed or modified via a combination of methods. After a thread has exited its execution, all its copies of thread-local instances are subject to garbage collection and must be removed to prevent memory leaks. If not taken care of properly, these memory leaks lead to load on the system, resulting in slower execution and inconsistent results.
ThreadLocal in Java provides below methods to achieve the same:
| Methods | Usage |
|---|---|
| initialValue() | Returns the current thread’s initial value for this thread-local variable. |
| set(T value) | Sets the current thread’s copy of this thread-local variable to the specified value. |
| get() | Returns the value in the current thread’s copy of this thread-local variable. If the variable has no value for the current thread, it is first initialized to the value returned by an invocation of the initialValue() method. |
| remove() | Removes the current thread’s value for this thread-local variable. This is essential to prevent memory leaks. |
Challenges in Parallel Execution without ThreadLocal
Before we understand ThreadLocal implementation using Selenium with Java, it is imperative to understand the problem with a practical example.
So, let’s start with the project setup.
Project Setup
For demonstration purposes in this blog, we have taken Eclipse IDE. You can use any other of your choice, and the setup will remain the same.
The same project setup will be used to demonstrate the usage of ThreadLocal in Java with Selenium WebDriver in the following section of this blog. We will only add a new package and Java test class files to showcase the changes in the same code. Therefore, carefully follow the setup on your machine to prevent any errors during execution.
Step 1. Create a new Maven Project and name it as ThreadLocal.
Step 2. Under src/test/java package, add a new package, WithoutThreadLocal. This is the package in which we add our test classes to demonstrate the problems we might encounter when executing in parallel without keeping thread safety in mind.
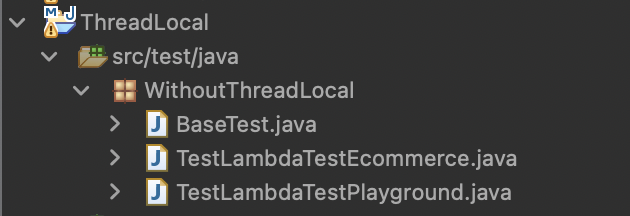
Step 3. Inside this new package, add three Java class files and name them as:
- BaseTest.java: This will have the code to launch and close the browser.
- TestLambdaTestPlayground.java: First test case file.
- TestLambdaTestEcommerce.java: Second test case file.
Once you perform all these steps, the project structure so far should look something like below:
As our project uses Selenium and TestNG along with WebDriverManager to launch the browser, add the latest stable versions of these dependencies inside the pom.xml for best execution results.
The updated pom.xml should look like this.
| <project xmlns=”http://maven.apache.org/POM/4.0.0″ | |
| xmlns:xsi=”http://www.w3.org/2001/XMLSchema-instance” | |
| xsi:schemaLocation=”http://maven.apache.org/POM/4.0.0 https://maven.apache.org/xsd/maven-4.0.0.xsd”> | |
| <modelVersion>4.0.0</modelVersion> | |
| <groupId>ThreadLocal</groupId> | |
| <artifactId>ThreadLocal</artifactId> | |
| <version>0.0.1-SNAPSHOT</version> | |
| <name>SeleniumThreadLocal</name> | |
| <dependencies> | |
| <dependency> | |
| <groupId>org.seleniumhq.selenium</groupId> | |
| <artifactId>selenium-java</artifactId> | |
| <version>4.18.1</version> | |
| </dependency> | |
| <dependency> | |
| <groupId>org.testng</groupId> | |
| <artifactId>testng</artifactId> | |
| <version>7.8.0</version> | |
| <scope>test</scope> | |
| </dependency> | |
| </dependencies> | |
| </project> |
view rawpom.xml hosted with ❤ by GitHub
With this, our basic project setup is completed. The following steps and configurations will be specific to the static WebDriver use case, which we use to understand the problem in parallel execution before proceeding to the solution.
In this example, we see how using a static WebDriver without ThreadLocal, in case of parallel execution, could lead to erroneous and uncertain results, impacting our automation framework’s overall performance.
Test Scenario
| Create a static WebDriver instance without ThreadLocal.Log the thread and driver reference details.Navigate to LambdaTest Selenium Playground.Print the page title along with thread details.Close the browser and print the thread and driver reference details again. |
Add the first Java class file as BaseTest.java.
| package WithoutThreadLocal; | |
| import org.openqa.selenium.WebDriver; | |
| import org.openqa.selenium.chrome.ChromeDriver; | |
| import org.testng.annotations.*; | |
| public class BaseTest { | |
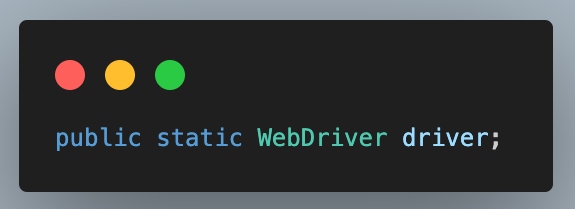
| public static WebDriver driver; | |
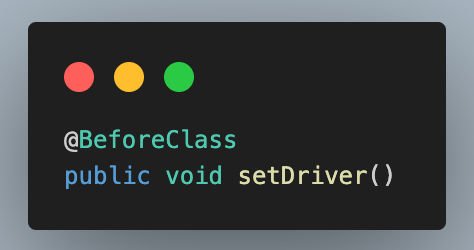
| @BeforeClass | |
| public void setDriver() | |
| { | |
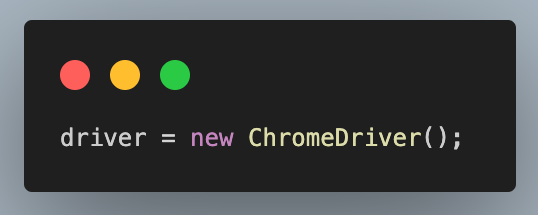
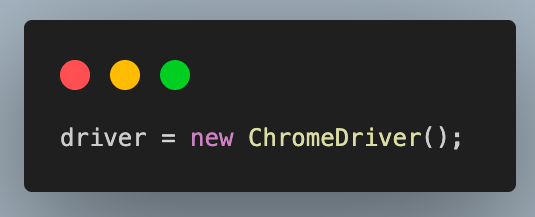
| driver = new ChromeDriver(); | |
| System.out.println( | |
| “Browser setup by Thread : ” + Thread.currentThread().getId() + ” and Driver reference is : ” + driver); | |
| } | |
| @AfterClass | |
| public void closeBrowser() { | |
| System.out.println(“Browser closed by Thread : ” + Thread.currentThread().getId() | |
| + ” and Closing driver reference is :” + driver); | |
| driver.quit(); | |
| } | |
| } |
view rawBaseTest.java hosted with ❤ by GitHub
Code Walkthrough: BaseTest.java
Step 1. Create an object of WebDriver. This will be used to perform browser actions.
Step 2. Add the first method as setDriver() and annotate it with the @BeforeClass annotation in TestNG to invoke it before each test class.
In this method, we create the instance of a new ChromeDriver to launch the Chrome browser and execute the test case. This is assigned to the WebDriver object created in the previous step.
Add a print statement to log the thread ID and browser reference information. This information will help check whether both threads had their independent thread variable in case of parallel execution.

Step 3. Add another method, such as closeBrowser(), and annotate it with @AfterClass annotation. This method will log the information like the previous one and close the driver instance after completing the test case.
Now, we add the test class files one by one.
| package WithoutThreadLocal; | |
| import org.testng.annotations.Test; | |
| public class TestLambdaTestPlayground extends BaseTest { | |
| @Test | |
| public void testLambdaTestPlayground() { | |
| System.out.println(“<- TestLambdaTestPlayground -> Executed by Thread : ” + Thread.currentThread().getId() | |
| + ” on driver reference : ” + driver); | |
| driver.get(“https://www.lambdatest.com/selenium-playground/”); | |
| System.out.println(“Title printed by Thread : ” + Thread.currentThread().getId() + ” <- ” + driver.getTitle() | |
| + ” -> on driver reference : ” + driver); | |
| } | |
| } |
view rawTestLambdaTestPlayground.java hosted with ❤ by GitHub
Code Walkthrough: TestLambdaTestPlayground.java
Step 1. Add the first Java test class file and extend BaseTest.
Step 2. Add the test method as testLambdaTestPlayground() and annotate it with @Test annotation.
Step 3. Add another print statement to log the thread, browser information and test name. This will help differentiate between test logs after all are executed in parallel runs.
Step 4. Navigate to the LambdaTest Selenium Playground website.
Step 5. Add another log to print the title with the thread ID.
| package WithoutThreadLocal; | |
| import org.testng.annotations.Test; | |
| public class TestLambdaTestEcommerce extends BaseTest { | |
| @Test | |
| public void testLambdaTestEcommerce() { | |
| System.out.println(“<- TestLambdaTestEcommerce -> Executed by Thread : ” + Thread.currentThread().getId() | |
| + ” on driver reference : ” + driver); | |
| driver.get(“https://ecommerce-playground.lambdatest.io/”); | |
| System.out.println(“Title printed by Thread : ” + Thread.currentThread().getId() + ” <- ” + driver.getTitle() | |
| + ” -> on driver reference : ” + driver); | |
| } | |
| } |
view rawTestLambdaTestEcommerce.java hosted with ❤ by GitHub
Code Walkthrough: TestLambdaTestEcommerce.java
This second test class, TestLambdaTestEcommerce, is very similar to the previous one, with only the difference in the website we navigate is a different title. This is used to differentiate the results when we execute with and without ThreadLocal in Java implementation.
Finally, update the default testng.xml. Since the execution will be parallel, update your testng.xml to specify the parallel execution mode and mention the test class names. One important thing to note here is that we renamed it to withoutThreadLocalTestng.xml to differentiate it from the one we added in the next steps to execute cases with ThreadLocal in Java implementation.
| <?xml version=”1.0″ encoding=”UTF-8″?> | |
| <!DOCTYPE suite SYSTEM “https://testng.org/testng-1.0.dtd”> | |
| <suite name=”Suite”> | |
| <test thread-count=”2″ name=”Test” parallel=”methods”> | |
| <classes> | |
| <class name=”WithoutThreadLocal.TestLambdaTestPlayground” /> | |
| <class name=”WithoutThreadLocal.TestLambdaTestEcommerce” /> | |
| </classes> | |
| </test> <!– Test –> | |
| </suite> <!– Suite –> |
view rawwithoutThreadLocalTestng.xml hosted with ❤ by GitHub
Execution Results
Now that we are ready with the code to see how it behaves in parallel execution with ThreadLocal, let’s execute the same.
To run the test cases in parallel, execute your withoutThreadLocalTestng.xml. Right-click on it, then go to Run As > TestNG suite.
Your console results would look like this:
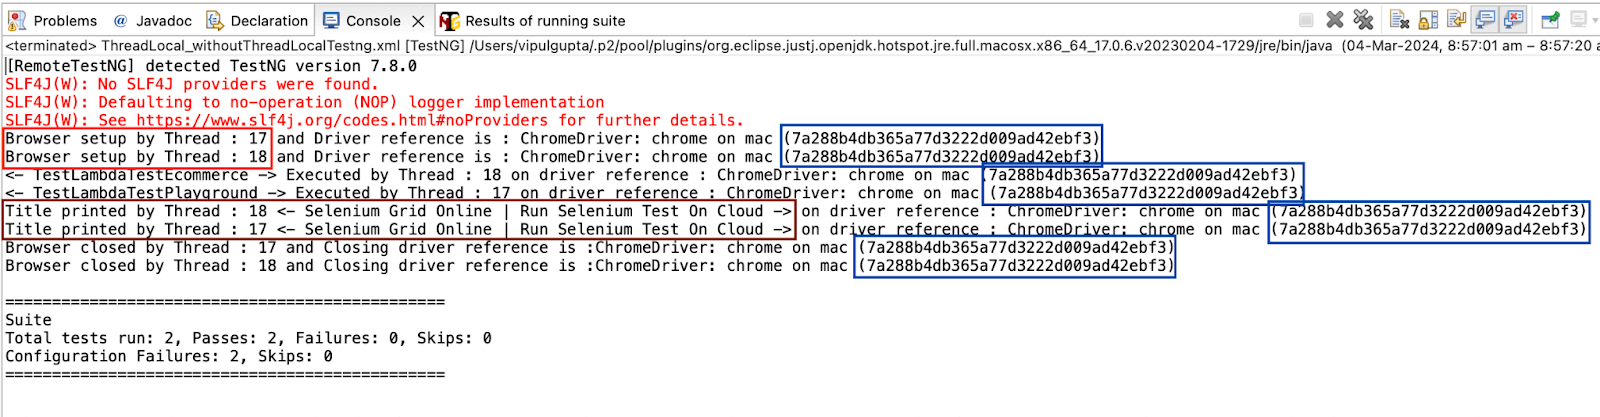
As you can see from the output screenshot above, we did get two different threads with IDs 17 and 18, but since we didn’t use ThreadLocal variables, our thread safety was compromised.
Both the threads refer to the same driver reference, which is evident from the same reference ID 7a288b4db365a77d3222d009ad42ebf3, and as a result, the title printed by both threads is also the same. This is the incorrect result, as the title should have been different for the websites we used in both cases. This is the problem we face when working with parallel execution and not keeping thread safety in mind to provide independent variables to each thread.
Demonstration: Using ThreadLocal in Java With Selenium WebDriver
Having understood the thread-safety challenges parallel execution could pose without ThreadLocal, let us now update the same automation code to use ThreadLocal in Java with Selenium WebDriver. This would help us to see how thread safety can be implemented to prevent cross-communication between independent threads. These changes showcase how ThreadLocal in Java helps run test cases in a thread-safe manner, making our suite more robust and less prone to failures.
We start by updating BaseTest.java and then make corresponding changes to the test files one by one. Let us see how these ThreadLocal changes are to be implemented.
| package WithThreadLocal; | |
| import org.openqa.selenium.WebDriver; | |
| import org.openqa.selenium.chrome.ChromeDriver; | |
| import org.testng.annotations.*; | |
| public class BaseTest { | |
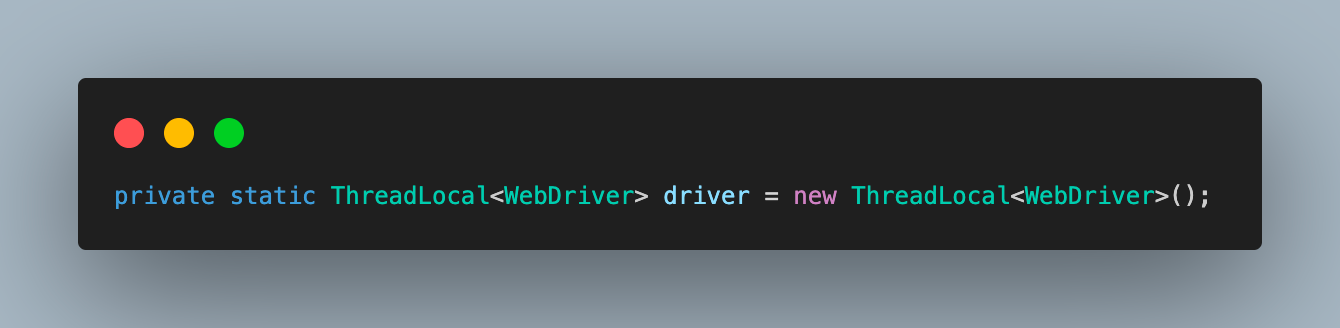
| private static ThreadLocal<WebDriver> driver = new ThreadLocal<WebDriver>(); | |
| @BeforeClass | |
| public void setDriver() | |
| { | |
| driver.set(new ChromeDriver()); | |
| System.out.println(“Browser setup by Thread : ” + Thread.currentThread().getId() + ” and Driver reference is : “ | |
| + getDriver()); | |
| } | |
| public WebDriver getDriver() { | |
| return driver.get(); | |
| } | |
| @AfterClass | |
| public void closeBrowser() { | |
| System.out.println(“Browser closed by Thread : ” + Thread.currentThread().getId() | |
| + ” and Closing driver reference is :” + getDriver()); | |
| driver.get().close(); | |
| driver.remove(); | |
| } | |
| } |
view rawBaseTest.java hosted with ❤ by GitHub
Code Walkthrough: BaseTest.java
Step 1. In this file, we start by replacing the static WebDriver object, with a ThreadLocal variable having WebDriver data type and initialize same.
Current code:
Updated Code with ThreadLocal:
This driver variable will help to ensure thread safety by providing an independent thread for each test execution. This means it would give two thread IDs, each containing a copy of the instantiated browser instance for all parallel executing test cases, unlike the previous implementation, which is prone to errors.
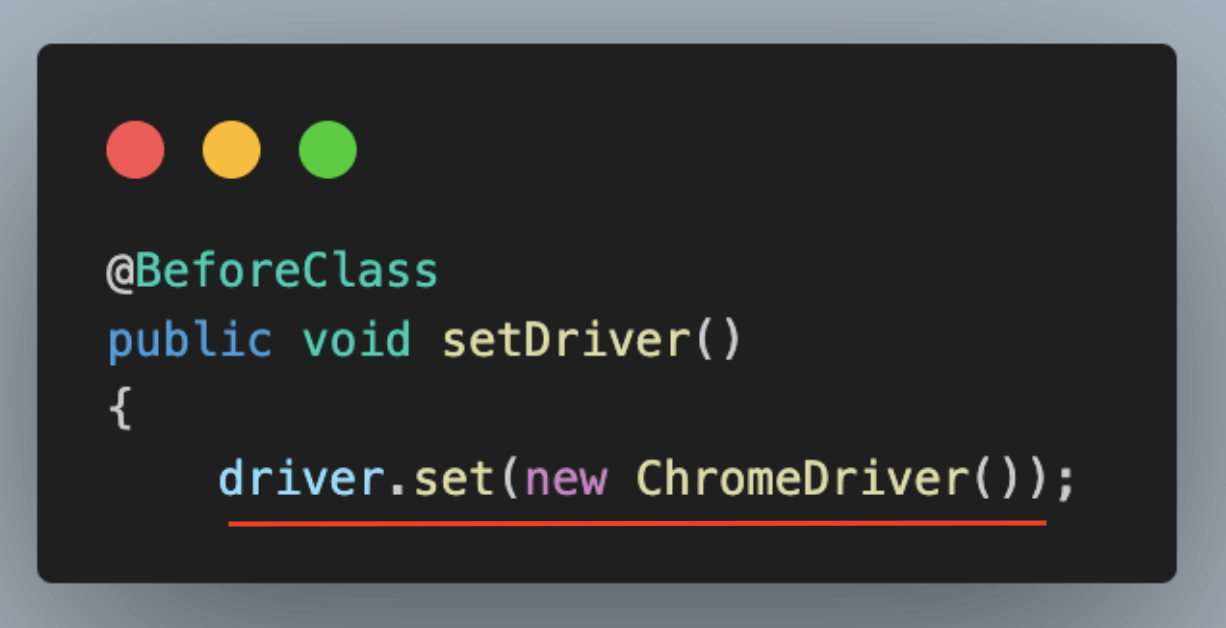
Step 2. Inside the setDriver() function, we use the set() method of ThreadLocal to assign the ChromeDriver reference to this driver thread local variable.
Current code:
Updated Code with ThreadLocal:
In the logging step, we update the driver variable to call the getDriver() method to get the browser reference information.

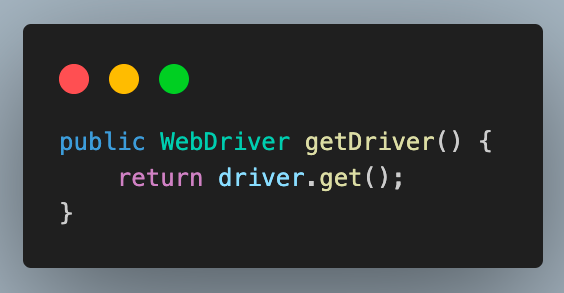
Step 3. Add a new function to this class as getDriver(). This is used to return the driver variable reference using the get() method of ThreadLocal.
Step 4. Similarly, update the logging step on the closeBrowser() method to use getDriver() to get the driver reference information.
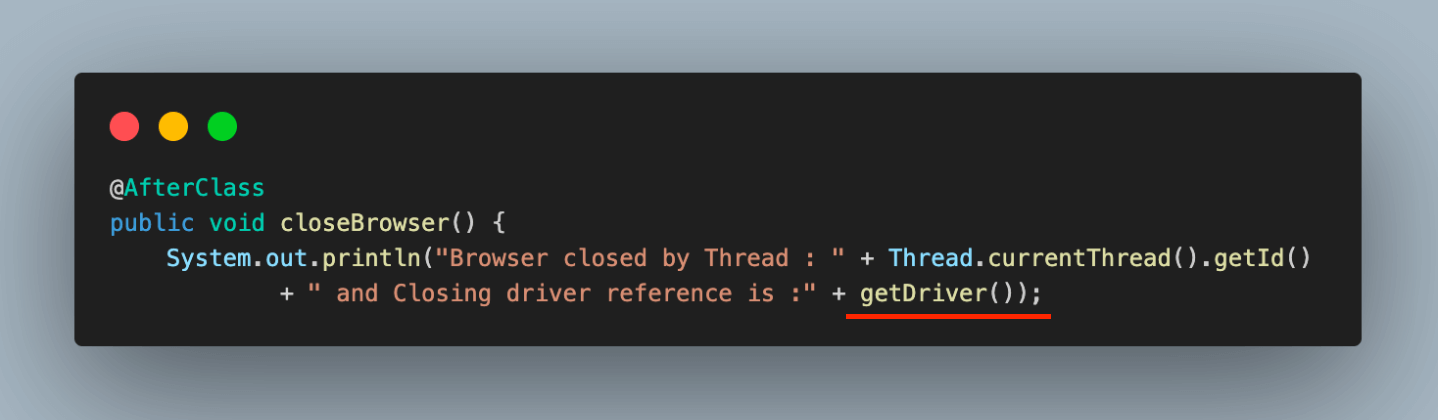
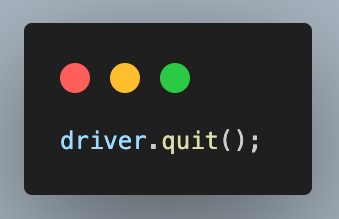
Next, add a step to close the web driver and then remove the ThreadLocal driver variable to prevent memory leaks.
Current code:
Updated Code with ThreadLocal:
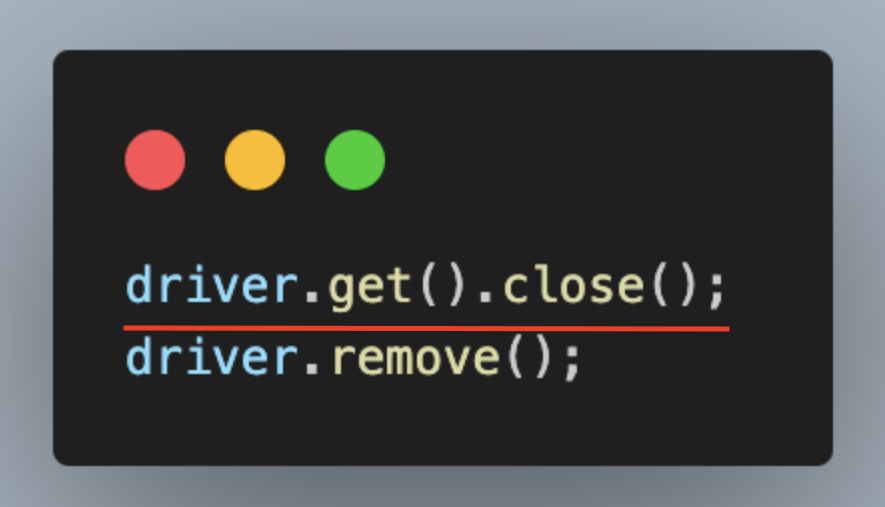
Using the remove() function helps to prevent memory leaks by clearing the assigned memory to the ThreadLocal variable. Thus, it prevents degradation in system performance by maintaining available memory for execution.
| package WithThreadLocal; | |
| import org.testng.annotations.Test; | |
| public class TestLambdaTestPlayground extends BaseTest { | |
| @Test | |
| public void testLambdaTestPlayground() { | |
| System.out.println(“<- TestLambdaTestPlayground -> Executed by Thread : ” + Thread.currentThread().getId() | |
| + ” on driver reference : ” + getDriver()); | |
| getDriver().get(“https://www.lambdatest.com/selenium-playground/”); | |
| System.out.println(“Title printed by Thread : ” + Thread.currentThread().getId() + ” <- “ | |
| + getDriver().getTitle() + ” -> on driver reference : ” + getDriver()); | |
| } | |
| } |
view rawTestLambdaTestPlayground.java hosted with ❤ by GitHub
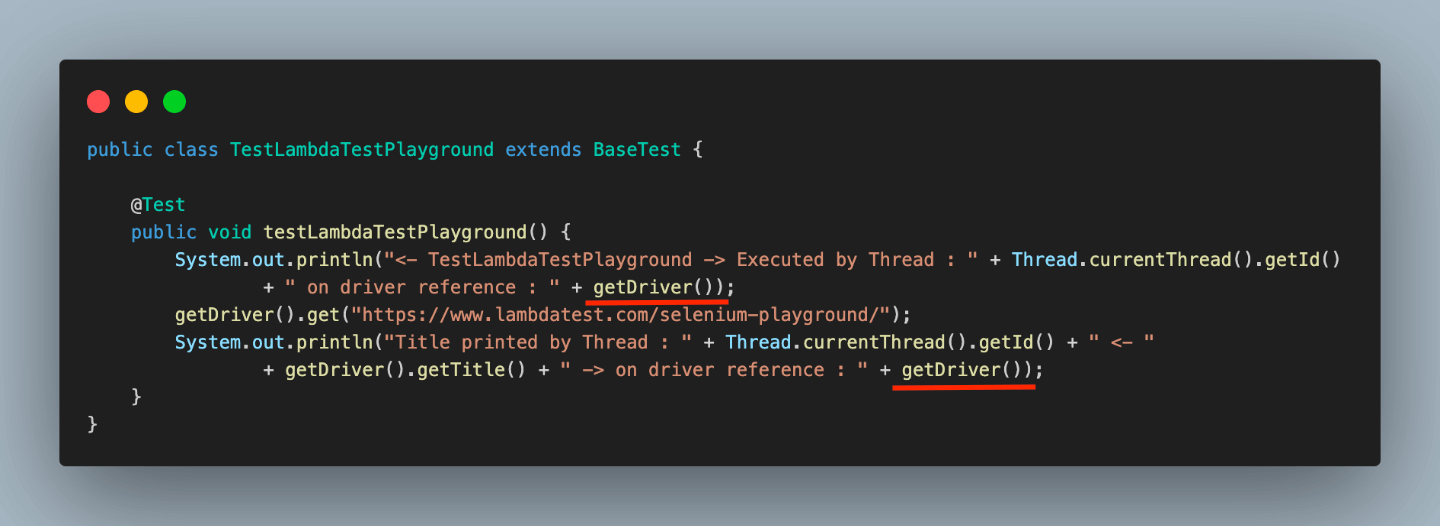
Code Walkthrough: TestLambdaTestPlayground.java
The code for both the test classes remains the same as earlier. The only change is how we refer to the driver reference object to get its information. While working with ThreadLocal, it is fetched using the getDriver() function of BaseTest.
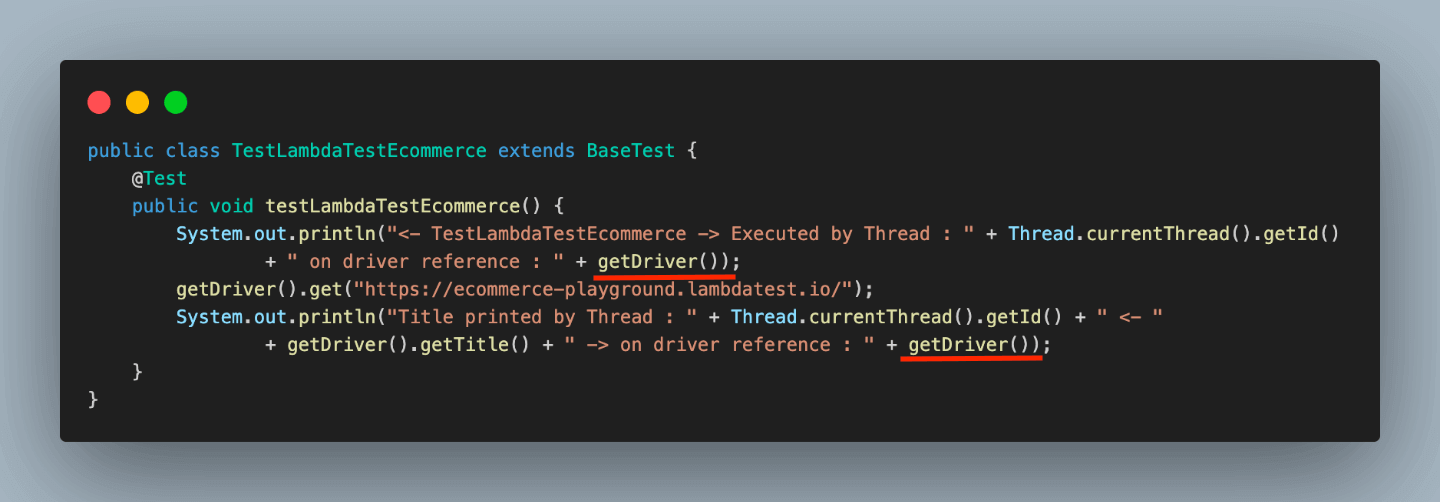
| package WithThreadLocal; | |
| import org.testng.annotations.Test; | |
| public class TestLambdaTestEcommerce extends BaseTest { | |
| @Test | |
| public void testLambdaTestEcommerce() { | |
| System.out.println(“<- TestLambdaTestEcommerce -> Executed by Thread : ” + Thread.currentThread().getId() | |
| + ” on driver reference : ” + getDriver()); | |
| getDriver().get(“https://ecommerce-playground.lambdatest.io/”); | |
| System.out.println(“Title printed by Thread : ” + Thread.currentThread().getId() + ” <- “ | |
| + getDriver().getTitle() + ” -> on driver reference : ” + getDriver()); | |
| } | |
| } |
view rawTestLambdaTestEcommerce.java hosted with ❤ by GitHub
Code Walkthrough: TestLambdaTestEcommerce.java
Similarly, in this test case, we updated the code to get the driver’s reference.
Finally, add another TestNG XML as withThreadLocalTestng.xml to execute the cases with ThreadLocal implementation.
| <?xml version=”1.0″ encoding=”UTF-8″?> | |
| <!DOCTYPE suite SYSTEM “https://testng.org/testng-1.0.dtd”> | |
| <suite name=”Suite”> | |
| <test thread-count=”2″ name=”Test” parallel=”methods”> | |
| <classes> | |
| <class name=”WithThreadLocal.TestLambdaTestPlayground” /> | |
| <class name=”WithThreadLocal.TestLambdaTestEcommerce” /> | |
| </classes> | |
| </test> <!– Test –> | |
| </suite> <!– Suite –> |
view rawwithThreadLocalTestng.xml hosted with ❤ by GitHub
Execution Results
Let us execute the cases using this XML and analyze the results to see the difference. This execution will help us understand how using ThreadLocal in Java with Selenium WebDriver helps to ensure thread safety and provides concrete results without thread interference.
Executing the same would give you results like the one below.
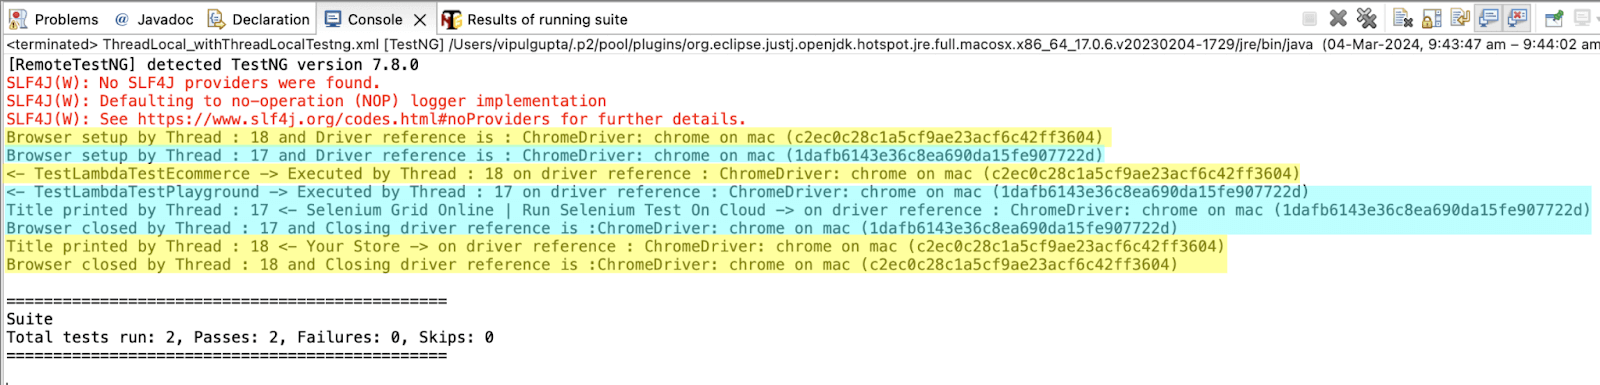
From the screenshot above, you can now notice that both threads have different browser references for executing the test case. Also, since both the cases on parallel execution have their independent thread-local browser variable, there is no interference, and both execute the test cases successfully and print the correct page title.
Yellow color represents Thread 18 : c2ec0c28c1a5cf9ae23acf6c42ff3604 : Your Store
Blue color represents Thread 17 : 1dafb6143e36c8ea690da15fe907722d : Selenium Grid Online | Run Selenium Test On Cloud
Using ThreadLocal in Java with RemoteWebDriver
package WithThreadLocal;

import java.net.*;
import java.net.URL;
import java.util.HashMap;

import org.openqa.selenium.WebDriver;
import org.openqa.selenium.chrome.ChromeOptions;
import org.openqa.selenium.remote.RemoteWebDriver;
import org.testng.annotations.*;

public class BaseTest {

	private static ThreadLocal<RemoteWebDriver> driver = new ThreadLocal<RemoteWebDriver>();

	String username = System.getenv("LT_USERNAME") == null ? "<lambdatest_username>" : System.getenv("LT_USERNAME");
	String accessKey = System.getenv("LT_ACCESS_KEY") == null ? "<lambdatest_accesskey>" : System.getenv("LT_ACCESS_KEY");

	public String status = "failed";

	@BeforeClass
	public void setDriver()
	{
		try {
			ChromeOptions chromeOptions = new ChromeOptions();
			chromeOptions.setPlatformName("Windows 10");
			chromeOptions.setBrowserVersion("122.0");

			HashMap<String, Object> ltOptions = new HashMap<String, Object>();
			ltOptions.put("build", "RemoteWebDriver with ThreadLocal");
			ltOptions.put("project", "RemoteWebDriver with ThreadLocal");
			chromeOptions.setCapability("LT:Options", ltOptions);

			driver.set(new RemoteWebDriver(
					new URL("https://" + username + ":" + accessKey + "@hub.lambdatest.com/wd/hub"), chromeOptions));
		} catch (MalformedURLException e) {
			e.printStackTrace();
		}
		System.out.println("Browser setup by Thread : " + Thread.currentThread().getId() + " and Driver reference is : "
				+ getDriver());
	}

	public WebDriver getDriver() {
		return driver.get();
	}

	@AfterClass
	public void closeBrowser() {
		System.out.println("Browser closed by Thread : " + Thread.currentThread().getId()
				+ " and Closing driver reference is :" + getDriver());
		driver.get().executeScript("lambda-status=" + status);
		driver.get().close();
		driver.remove();
	}
}
TestLambdaTestEcommerce class
package WithThreadLocal;

import org.testng.annotations.Test;

public class TestLambdaTestEcommerce extends BaseTest {
	@Test
	public void testLambdaTestEcommerce() {
		System.out.println("<- TestLambdaTestEcommerce -> Executed by Thread : " + Thread.currentThread().getId()
				+ " on driver reference : " + getDriver());
		getDriver().get("https://ecommerce-playground.lambdatest.io/");
		System.out.println("Title printed by Thread : " + Thread.currentThread().getId() + " <- "
				+ getDriver().getTitle() + " -> on driver reference : " + getDriver());
	}
}
TestLambdaTestPlayground class
package WithThreadLocal;

import org.testng.annotations.Test;

public class TestLambdaTestPlayground extends BaseTest {

	@Test
	public void testLambdaTestPlayground() {
		System.out.println("<- TestLambdaTestPlayground -> Executed by Thread : " + Thread.currentThread().getId()
				+ " on driver reference : " + getDriver());
		getDriver().get("https://www.lambdatest.com/selenium-playground/");
		System.out.println("Title printed by Thread : " + Thread.currentThread().getId() + " <- "
				+ getDriver().getTitle() + " -> on driver reference : " + getDriver());
	}
}
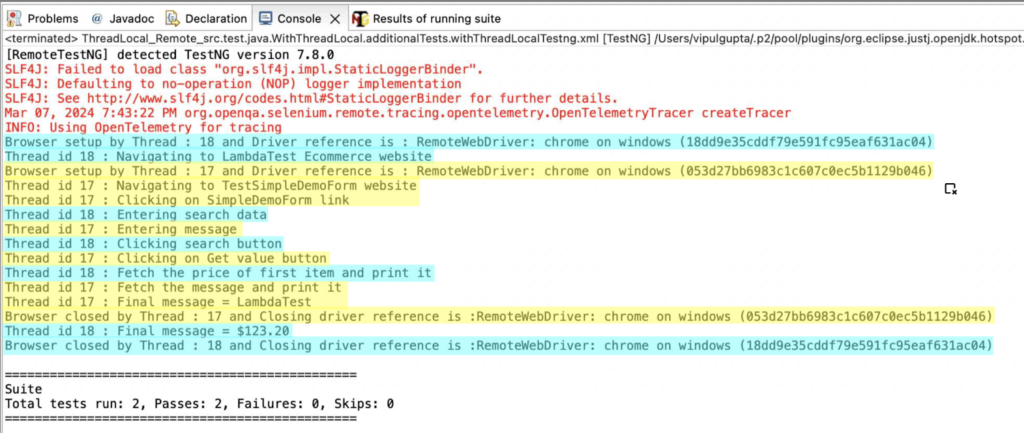
Output
Leave a Reply